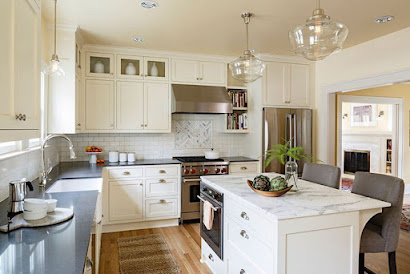
How to work woodworking for home bar?
reating a custom woodworking project for your home bar can be an exciting and rewarding experience. Whether you’re designing a small, cozy bar in a corner of your living room or a full-fledged home bar for entertaining guests, woodworking allows you to craft a unique and personalized space. Here’s a guide to help you get started on your woodworking project for your home bar:
1. Plan Your Design
Before you dive into woodworking, it’s essential to plan your home bar design carefully. Think about the space available and how you want the bar to fit into your home’s aesthetic. Here are a few things to consider:
- Space: Measure the area where you plan to build your bar. Consider factors like height, width, and depth, ensuring there’s enough room for seating, storage, and accessibility.
- Style: Decide on the look you want—modern, rustic, industrial, or traditional. This will guide the choice of materials, finishes, and design elements.
- Functionality: Consider how your bar will function. Will it be a simple countertop for mixing drinks or do you need built-in storage for bottles and glasses? Will you need additional shelves or cabinets for organization?
2. Select the Right Materials
Choosing the right materials is crucial for a high-quality home bar. Wood is an excellent material for creating a warm, inviting atmosphere, but you should select wood that suits your style and needs. Here are some common types of wood used for home bars:
- Hardwoods: Woods like oak, maple, walnut, and cherry are sturdy and offer a rich aesthetic. These materials are perfect for constructing countertops, shelves, and cabinets.
- Softwoods: Pine and cedar are more affordable and can be used for lighter, rustic designs. They’re also easier to work with if you're a beginner woodworker.
- Reclaimed Wood: Using reclaimed wood gives your home bar a vintage or rustic charm. It's eco-friendly and can add a lot of character to your bar.
- Plywood: For the structure, plywood can be used for the base and frame of your bar.
3. Build a Solid Foundation
A sturdy frame is essential for your home bar. Whether you're building a freestanding bar or attaching it to a wall, start by constructing the base. Use strong wood pieces to create a solid foundation. This foundation will support the bar's top, shelves, and any other structures you decide to add.
- Frame Construction: Build a rectangular or square frame using 2x4s for the base. Add vertical supports and cross beams to keep the frame stable.
- Countertop: Once the frame is in place, build the countertop. This is the surface where you’ll prepare drinks and serve guests. You can opt for a wood top or add a granite or marble finish for a luxurious touch.
4. Add Storage and Shelving
Storage is a critical element of any home bar. You’ll need a place for bottles, glasses, and tools like shakers and strainers. Woodworking allows you to create custom shelving and cabinets that fit perfectly into your bar’s design.
- Shelving: Install open shelves or glass holders on the wall above your bar for easy access to drinks and glassware. Floating shelves can offer a clean, modern look.
- Cabinets: For a more organized approach, consider building cabinets beneath the countertop for bottle storage or a place to store bar tools, mixers, and other accessories.
- Wine Rack: If you’re a wine enthusiast, you can add a custom wooden wine rack or wine fridge into your bar design.
5. Incorporate Design Elements
Once you’ve built the functional parts of your bar, it’s time to focus on the design and finishing touches. Woodworking allows you to personalize your home bar with unique elements that reflect your style.
- Bar Front: Consider adding a decorative wood panel to the front of your bar. This can be a simple wood veneer or more intricate detailing, such as slats, beadboard, or decorative carvings.
- Lighting: Install under-cabinet or pendant lighting to add ambiance to the space. Lighting is essential for setting the mood in a home bar and highlighting your beautiful wooden finishes.
- Bar Stools: Build or purchase custom stools that complement your bar's design. Wooden stools with cushioned seats can provide comfort and style.
- Bar Accessories: Customize other elements like wooden trays for serving drinks, custom cocktail stirrers, or a wooden sign with your bar’s name.
6. Finishing Touches
After constructing the main structure of your home bar, it's time to finish the wood to protect it and enhance its appearance.
- Sanding: Use sandpaper to smooth out rough edges and surfaces.
- Staining or Painting: Apply a wood stain to give your bar a deeper color or paint it to match your interior décor. For a more modern look, consider using lighter wood stains, or for a rustic or vintage feel, opt for darker, weathered finishes.
- Sealing: Protect the wood by applying a polyurethane or lacquer sealant. This will protect the surface from spills, scratches, and general wear and tear.
7. Install and Enjoy Your Bar
Once your bar is built, finished, and ready to go, it's time to install it in your home. If it’s a freestanding bar, simply place it in the desired location. For wall-mounted or built-in bars, follow your design plan to secure it to the wall. After installation, fill your bar with your favorite drinks, glasses, and accessories, and it’s ready for use.


Comments
Post a Comment